Search

The Life of a Crunchy Mama

Tag

organic

Babies Come When They Are Ready

Today I saw a Facebook status that just drove me absolutely insane. A girl posted a status venting about how if she isn’t dilated by Monday (her due date) she will be induced. My jaw dropped. Let me clarify, I try not to be judgmental of other moms. Instead of ridiculing and criticizing other moms I try to let them be. Unless there is a safety issue regarding a mother or her child, I let the mom make decisions.

That does not mean that I don’t judge educated, intelligent, medical professionals who “understand medical processes better than anyone”. These doctors should know better. These doctors should understand the processes of pregnancy, labor, and birth.

Doctors are simply selfish. They decide when your baby comes, but it shouldn’t be that way. The decision should be up to your baby. If a doctor is planning on leaving for a trip when you’re 41 weeks along, he or she may want to make dang sure that your baby comes before that. This is the same reason that the American C-Section rate is so high. Doctors come up with some excuse about your labor not progressing as it should as an excuse to cut you open to fit in perfectly with their time schedule.

Sometimes the mother is selfish. She’s uncomfortable. She is anxious to meet the baby growing inside of her tummy. Maybe she is sick of lugging around an extra 40 pounds. She’s probably hot and tired. She might even be “so done with being pregnant”. Doctors do experience pressure from moms who don’t want to be pregnant anymore. That doesn’t mean that it is in the safest or best interest of their little one to be forced to enter this world before they are ready.

Due dates are just an estimate. Typically, the doctor will ask you what the first day of your last period was, and 40 weeks after that is your due date. But what if someone has a period that isn’t consistent? What if they had their period during pregnancy? (Yes, that happens). You might be thinking ‘then they can do an ultrasound that says how far along they are’. Babies grow at their own rate. Sometimes babies measure days and even weeks off of what they are “supposed to be at”. It’s all really an educated guess. Inducing someone at 40 weeks is a risk of inducing someone who is really 38 weeks.

Babies come when they are ready. Babies develop at their own rate. Sometimes babies just aren’t ready to come at 40 weeks. Sometimes they aren’t ready to come at 41 weeks, and ya know what? That’s okay. I promise that your baby will come. You won’t be pregnant forever. Your baby will probably be even healthier if you wait.

And lastly, let me just mention that your chance for a natural vaginal delivery greatly decreases after being induced. Pitocin increasing the strength of contractions, making the pain even worse. This is when many women opt. for epidurals. Being induced also more than doubles your risk for a C-Section. Unnecessary induction is not only NOT necessary, but it’s NOT safe.

Before anyone jumps down my throat thinking I’m unsafe and uneducated, I do want to clarify that I completely realize that their are circumstances where induction, not natural births, and Cesarean Deliveries are in the best interest of the baby and mother. I’m not criticizing moms who have been induced, used medical intervention during labor or delivery, or who have brought their child into the world through C-Section. I’m just venting about the lack of compassion and education that doctors display when they make poor decisions when it comes to inducing a mother at only 40 weeks.

I’ve said it before, and I’ll say it again. Babies come when they’re ready.


(Somewhat) “Crunchy” Celebrities

Some people look at “crunchy” parents as hippies who breastfeed their four year old, don’t bathe their child, and only feed their child organic food because they are “better” than other parents.

To me crunchy is an adjective used to describe a form of parenting or life even that encourages breastfeeding, babywearing, gentle parent. If you haven’t read the title of my blog, now you’ll know that “The Life of a Crunchy Mama” is in fact a blog that encourages all things crunchy too!

But you don’t have to be a hippie to be crunchy. You don’t have to do all things “crunchy” to be crunchy. Because some celebrities are crunchy too, and I’m going to share a few with you!

gwen

This is Gwen Stefani breastfeeding her child in public. ❤

channing

Here’s Channing Tatum rocking the Moby Wrap.

nicole trunfio.jpeg

Here Nicole Trunfio is breastfeeding her son Zion.

jessica albs.jpg

Here’s Jessica Alba babywearing!

doutzen.jpeg

Doutzen Kroes is breastfeeding her (then) 5 month old.

orlando bloom.jpg

Here’s Orlando Bloom following the “close enough to kiss” rule!

mayim.jpg

Mayim Bialik, the queen of all things crunchy, and she even wrote a book about it.

olivia wilde.jpeg

Olivia Wilde is a breastfeeding, babywearing mama. This picture is gorgeous!

peter dinklage.jpg

And one of Peter Dinklage babywearing.

Tom Brady

Tom Brady and his wife used Elimination Communication to potty train their child by six months old.

pink.jpg

Pink gave up her party girl lifestyle when she became a mom. Here’s a shot of her breastfeeding!

carey hart.jpg

And Carey Hart babywearing while walking the beach with Pink.

brad pitt.jpg

And Brad Pitt co-sleeps with his little ones.

angelina.jpg

Brad took this picture of Angelina Jolie breastfeeding one of her (then) newborn twins in 2008.

jennifer g.jpg

This is Jennifer Garner babywearing!

alyssa m.jpg

And here’s Alyssa Milano breastfeeding her little one.

christopher jarecki.jpg

Here’s Christopher Jarecki wearing baby in a sling.

beyonce.jpg

Beyonce babywears and breastfeeds too!

miranda kerr.png

Miranda Kerr breastfeeding beautifully.

neil.jpg

Neil Patrick Harris and David Burtka wearing their twins

maggie.jpg

Maggie Gyllenhaal breastfeeding

No-Poo Method

What’s the “no-poo” method?
Basically, it’s a method where you do not wash your hair with shampoo. Sometimes the shampoo is replaced by baking soda and water, and sometimes the conditioner is replaced by a mixture of vinger (either Apple Cider Vinegar or Distilled White Vinegar).

Why go “no-poo”?
Eliminating shampoo from your hair care routine can treat oily hair or dry hair. It can also help with dandruff and other hair problems. Some people choose no-poo because it doesn’t use any chemicals. Some people choose it because it made their hair healthier and stronger. Others think this is a great alternative to expensive hair products.

Items you should have if you want to go “no-poo”

A boar bristle brush: This distributes the oils on your scalp throughout the rest of your hair and onto your ends.

Baking soda: This can be a good alternative to shampoo for those super oily hair days.

Vinegar: You will need to decide whether you’d use Distilled White Vinegar or Apple Cider Vinegar on your ends. It may be good to have both on hand in case one doesn’t work well for you.

Dry Shampoo: I used Chagrin Valley brand. It’s the only one I’ve tried, but it’s USDA Organic, and that appeals to me.

Shampoo: During my “no-poo” method in the first month my hair got so ridiculously oily that I needed to use shampoo or I’d freak out. I used Chagrin Valley shampoo bar, but it’s important for you to do research on the best shampoo for you before going into this. I personally recommend avoiding sulfates and other harmful chemicals often found in store bought shampoo.

Journal: It’s great to journal your hairs progress, so you can truly keep track of your personal “no-poo” method experience

Camera: Make sure to take lots of pictures of your hair because this will go hand-in-hand with journaling.

The oily stage
Many people that claim that the “no-poo” method doesn’t work just can’t get over the oily stage. I’m here to attest that the oily stage is real, and it’s AWFUL. This is the process where your head is detoxing, and the oil on your scalp continues to produce until it realizes that it doesn’t need to make it anymore. This stage can last anywhere from a few days to a few months. You can hide the grease on your hair by wearing your hair up with headbands, braiding your hair, by using dry shampoo, or other methods to cover up that “greaser” look.

Things that will play a part in your results
Hard water: It’s brutal to your hair. Your “no-poo” result will be the best if you have soft water.

Your hair type: Some hair types take a longer time to transition into “no-poo” than other hair types. Be patient and don’t give up.

What’s right for you
Based on my experience and what I’ve read, oily hair and dry hair should use different procedures when participating in the no-poo method. As time goes on you can adjust and try new this. If your hair is oily, using more baking soda may be the best fit for you. Also, in your rinse you should use Distilled White Vinegar. If your hair is dry, you should use less baking soda. Your rinse should consist of Apple Cider Vinegar.

What I did
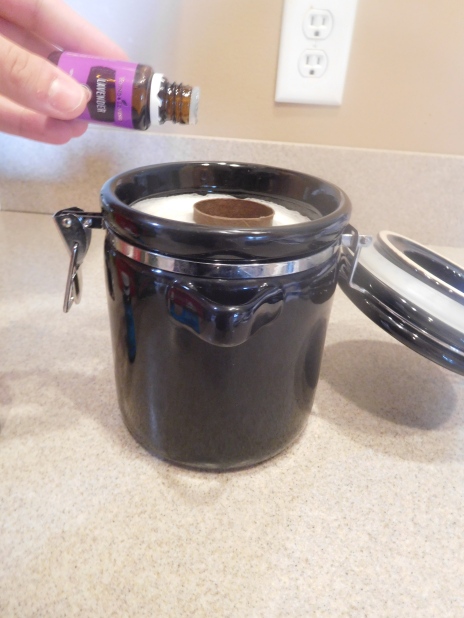
In the beginning all I did was rub 1 tsp. of baking soda into my scalp. Eventually this made my hair itchy. That’s when I cut down to 1/2 tsp of baking soda and 2 drops of tea tree oil. This is also when I added in a mixture of 1 cup to 1/2 tsp. of Distilled White Vinegar into a spray bottle and I applied this onto my ends.

Hair Log
Below I have included a log of the first month of my no-poo experience.

Day #1: I shampooed my hair yesterday and used my homemade leave-in conditioner. My hair isn’t super oily, but it doesn’t look clean either.

Day #2: Today I used 1 tsp. of baking soda and massaged it into my scalp, then I rinsed it out well. After that I put leave-in conditioner in my hair.

5-11.JPG

Day #3: I just used water on my hair and wore it up.

Day #4: Again I massaged 1 tsp. of baking soda into my hair. It seemed to help hide some of the grease, but it still looks greasy. I wore it up to hide some of that grease.

Day #5: I washed my hair with just water. My scalp is starting to feel itchy.

5-14.JPG

Day #6: My hair looks very greasy. I brushed it to distribute my natural oils and then I wore it up. My scalp feels itchy. I don’t know if the grease is making it itchy, if it’s the hard water, or if I used too much baking soda. I may alter my hair procedure when I “wash” it tomorrow.

Day #7: My hair looked awful. I feel like half of my hair is covered in grease, and the scalp has a THICK layer of it. So today I rubbed 1/2 tsp. of baking soda into my scalp, rinsed it out, then put leave-in conditioner in it. I’m hoping that less baking soda stops the itch. I’m also seeing white chunks in my that may be a result of the calcium build up from our hard water. Today I ordered a shampoo bar and dry shampoo from Chagrin Valley because I know after long term use baking soda can damage hair. I want an alternative option for when I want to discontinue the use of baking soda that still doesn’t strip my hair’s natural oil from my head.

Day 8: My hair is still kind of greasy. It seems to look a little better and I don’t know if my hair is improving or if I’m getting used to the greasy look. My head is still itchy so I may alter my routine next baking soda day.

Day 9: My hair looks so bad that I’m actually considering washing my hair with shampoo at this point. My hair looks greasy and limp. It still itches too. Ugh!

5-18.JPG

Day 10: At this point there’s nothing I can do to hide the mass of grease lathered hair on my head. I’ve also noticed that since beginning the “no-poo” method my face has gotten more acne on it…probably from the oils from my head. If I get my shampoo bar tomorrow I’ll use that instead of baking soda tomorrow.

5-19.JPG

Day 11: My hair is basically the same as the past few days. I did a hair mask of 2 egg whites, 1 tbsp. of lemon juice, and a dash of salt. I let that sit on my head for 30 minutes, rinsed it with lukewarm water (hot water “cooks” the egg), then washed it with 1/2 tsp. of baking soda and 1 drop tea tree oil. I chose the tea tree oil this time because it’s anti-fungal, and I’m hoping it eliminates the awful itchiness I’ve been dealing with. I hope improvements begin before I go to South Dakota because I will be seeing family. Needless to say, super oily hair would be a major embarrassment.

Day 12: My hair doesn’t look super greasy when it’s up. My Chagrin Valley soaps came in, so I’m excited to try them. Also the white chunks in my hair are GONE! Yay! I’m giving the credit of that to the tea tree oil (God, I love essential oils).

Day 13: I’ve been getting some pretty rude comments about my hair from my mom 😦 But I want to change my oily hair to healthy hair!

5-22.JPG

Day 14: Nothing really to tell. My hair doesn’t look worse, but it doesn’t look better either.

Day 15: My head feels itchy again, so I will be sure to use tea tree next time that I shower. Also, I used the Chagrin Valley dry shampoo for the first time, and it seemed to help hide the grease if you use a LOT of it! I LOVED the smell of it though.

5-24.JPG

Day 16: I don’t feel super great because I think I think I have food poisoning. I took a bath with lavender, peppermint, and cedarwood in it (all good oils for hair and relaxation). I also did a vinegar rinse of my hair for the first time. I did a mixture of 1 cup of distilled water to 1/2 tsp. of Distilled White Vinegar in a spray bottle and sprayed it on my ends. After that shower I put leave-in conditioner on the ends of my hair.

Day 17: My is the same as it’s been.

5-25.JPG

Day 18: I used my Chagrin Valley shampoo bar, and I liked the smell and my hair felt clean. The picture above this is a photo of my hair after I used the shampoo bar.

5-27.JPG

Day 19: I used the dry shampoo and wore my hair down. It stilled seemed clean, and usually my hair would already be greasy the day after washing it.

5-28.JPG

Day 20: I wore my hair up because my hair seemed like it was beginning to get greasy.

Day 21: I washed my hair with 1/2 tsp. of baking soda mixed with 2-3 drops of tea tree essential oil. The soft water in South Dakota (where I’m currently staying) has helped my hair a TON. I was able to wear it down for church today.

5-30.JPG

Day 22: Today I used the dry shampoo and wore it down again. My hair is far less greasy than it would be 4 days after washing it with shampoo.

Day 23: I wore my hair up and it doesn’t look too bad. I may be out of the greasy stage finally (fingers crossed).

Day 24: My hair is definitely officially greasy again, but I am seeing slow improvements in my hair the longer I do the “no-poo” method.

Day 25: My scalp is greasy. My ends are dry. Today I just took a bath mixed with breast milk (don’t judge me…breast milk is great for everything I promise). Then I put the vinegar rinse on my ends. Now that I’m back in Wisconsin I’m worried that the hard water is going to be tough on my hair again.

6-3.JPG

Day 26: My hair is officially NASTY. It will be up until my next shampoo bar or baking soda day. I also bought an organic conditioner (Pura d’or), and after washing my hair with just conditioner my hair felt and looked much better.

Day 27: The conditioner wash helped my hair so much that I may be able to wear my hair down if I use dry shampoo.

6-5.JPG

Day 28: Today was supposed to be a baking soda day, but because my hair didn’t look to greasy when I used dry shampoo, I decided to skip the “wash”.

Day 29: My hair is down and greasy, but I’m still pretty confident that the “no-poo” method works.

6-7.JPG

Day 30: Well, I’ve been “no-poo” for 30 days now, and at this point there isn’t much to say. My hair is still slightly greasy and if I went out in public I’d probably choose to wear it up.

Day 31: Today I washed my hair with 1/2 tsp. of baking soda and 2 drops of tea tree essential oil. Then I sprayed my ends with my vinegar mixture. After I got out of the shower I sprayed my leave-in conditioner on my ends.

6-9.JPG

Day 32: My hair still looks greasy. I plan to continue my “no-poo” journey for another month, and I hope the my scalp begins to regulate within that time. I will post an update of month 2 when that time comes.

As always if you have an comments, concerns, questions, or tips, you can e-mail me at ilikefreebabystuff@yahoo.com or comment on one of my posts. 🙂

Homemade Toothpaste

Who doesn’t want clean, white, sparkly teeth? I’ve always had white teeth, not movie star white, but I always felt my teeth were something to be proud of. After having my son, chemicals in baby products became a HUGE concern to me. Now, not only do I worry about the products I use on Jayce, but also what I use on myself.

One of the first products I made for myself was homemade toothpaste. I have been using this toothpaste for about 6 months now, and I will never go back.

What you’ll need:

DSCN2407.JPG


1/2 cup coconut oil: kills bacteria, whitens teeth, freshens breath

1/2 tsp. of baking soda (you can use less if you don’t like the taste): whitens teeth

1 dash of salt (optional): creates an environment that is difficult for bacteria to survive in, promotes healing in the mouth

10 drops of Young Living essential oil (Thieves, Peppermint, Tea Tree, Lemon, Citrus Fresh, Orange, Lime are some good choices): kills bacteria, whitens teeth, adds flavor, freshens breath

Small glass container with a lid: essential oils should not be put in plastic

DSCN2408.JPG

In small glass container mix coconut oil, baking soda, salt, and essential oils with a fork. Make sure that it looks “whipped” and that all ingredients are evenly mixed.

DSCN2410.JPG

Put cover on and store at room temperature. That’s it 🙂 Enjoy healthy, white, natural teeth!

  • Since I’m the only one who uses this toothpaste, I just dip my toothbrush into the container, but if you share this with other people you can use a spoon or Q tip to transfer it from the container to your tooth paste.
  • Initially this tooth paste takes a while to get used to primarily because of the coconut oil, but as time goes on, it gets better
  • I’d love to hear how this toothpaste worked for you. As always feel free to email me at ilikefreebabystuff@yahoo.com or by commenting on this post.

Chemicals in Baby Products

Before I became a mommy, I didn’t care what I used on my body, face, or hair. I mean, I wasn’t EVER concerned about long term effects of that perfect face wash, great smelling shampoo, or exfoliating body wash. I wouldn’t even look at the back of the bottle. I’d just buy it, and go with it.

Now that I’m a mommy, I really do care. I care about what goes on my face, body, and hair now, but I especially care about what goes on my son’s body, face, and hair. I was way too ignorant, and now I know so much better. Not all baby products are safe. In fact, most products (yes, even one’s for babies) are NOT safe for anyone.

As I am still a highschooler, I am taking a wonderful class called Project Based Leaning. That class lead me to begin my first blog “Teen Mommy“, where I still actively blog. That class ended up leading me to learning about birth customs around the world, talk about fetal development, and now it’s bringing me to tell you all about the chemicals in baby products (you can read my full paper here). In order to find out about other parents’ perspectives on this I created a survey (you can take it too by clicking survey) .

Why should you be concerned about chemicals?

You should be concerned about chemicals because what’s put on your child’s skin now can have life long effects on him/her.

A list of harmful chemicals

Phthalates: These are a preservative that has been linked to reproductive and developmental harm including lower sperm count and genital birth defects. They’ve also been linked to obesity, a decrease in female fertility, preterm birth and low birthweight, a worsening of allergy and asthma problems, and behavior changes.

Fragrance: Often times Fragrance is used to hide the smell of toxic chemicals (including phthalates). Fragrance is linked to allergies, eczema, skin irritation, and can be toxic to bodily organs. They also may contain neurotoxins, a poison that acts on the nervous system.

Formaldehyde:  Formaldehyde is a carcinogen added to items to prevent molding. It’s often found in clothes. People who are exposed to more Formaldehyde are at greater risk for developing cancer. This can be avoided by washing clothing several times before using them for the first time.

1,4-dioxane: Studies have shown that people exposed to a large amount of 1,4-dioxane may experience symptoms such as vertigo, irritation of eyes, nose, throat, and lungs, as well as skin irritation. Since 1,4-dioxane does not have to be included on labels because it is a chemical byproduct.

Oxybenzone and Retinyl Palmitate: Oxybenzone and Retinyl Palmitate (a form of Vitamin A) are ingredients commonly found in sunscreens. Oxybenzone, found in 56% of sunscreens, has been linked to endocrine disruption and reproductive problems. Retinyl Palmitate, found is 25% of sunscreens, has been linked to the increase of developing skin lesions and tumors.

Pesticides: Pesticides are substances used to fight off pests, such as fungi, weed, and insects. Pesticides work by attacking the central nervous system, immune system, and cellular structures of life forms. Studies have shown that children with higher levels of pesticides residue in their body revealed higher levels of behavioral problems, are more likely to be diagnosed with ADD and ADHD, and have higher levels of neurological disfunction problems and learning disabilities. 

How can you protect your child?

Unfortunately, phthalates, fragrances, formaldehyde, 1,4-dioxane, oxybenzone, retinyl palmitate, and pesticides are found in what seems like everything. Hope is not lost though, you can avoid these chemicals by choosing organic options (Dr. Bronners, California Baby, Honest Co.) or making your own. I choose to make my own diaper rash cream, disposable baby wipes, cloth baby wipes, body wash and shampoo, body butter, and many other items to avoid chemicals like these. It would also greatly benefit you to know what to look for on the labels of the products you purchase.


As always if you have any questions, comments, or concerns about the chemicals found in baby products or anything else, you can comment on my post(s) or e-mail me at ilikefreebabystuff@yahoo.com


Homemade Baby Lotion

From the time Jayce was born, I’ve loved using coconut oil and essential oils on my little bundle of joy. I LOVED the smell, and I like knowing what I was rubbing on my sweet little man. You would not believe the load of chemicals that are in some store bought baby lotions. I found this body butter lotion for babies, and I am hooked!

What you’ll need:

1/4 cup of coconut oil

1/4 cup of shea butter

2 oz. of sweet almond oil (jojoba or olive oil would work too)

8-10 drops of Gentle Baby essential oil (Lavender or Peace and Calming would work too)

DSCN2116.JPG

Place coconut oil, shea butter, and sweet almond oil in a stove pot on medium heat until all ingredients are melted. It should become a clear liquid.

DSCN2118.JPG

Place mixture in a bowl and let sit in the refrigerator until contents harden and become white. This should take about one hour.

DSCN2132.JPG

Use a hand mixer to mix the mixture until it becomes whipped. This should take about 5 minutes.

DSCN2134.JPG

Place essential oils into the mixture and stir in so your oil of choice is evenly mixed in. Place this in a glass jar (essential oils degrade plastic) with a lid and refrigerate for another hour.

Enjoy your new lotion 🙂


Homemade Baby Wipes

*UPDATED*

A while back I found a recipe for homemade baby wipes on Pintrest (I LOVE PINTREST!) for homemade disposable wipes.  Anyways, I decided to give the homemade ones a whirl and just go for it for four reasons: I HATE the terrible chemicals in most store bought brands (looking at the ingredients list made me cringe), my son has VERY sensitive skin, I had just about all of these ingredients at my house already, and I hate how much money I spend on wipes. I really like them! They smell fresh and clean, and Jayce’s diaper rash has completed disappeared since I began using them! That means less diaper rash cream.

DSCN1475

What you’ll need:

Glass container with lid that closes tightly (I got mine at Good will for $4)

1 roll of Bounty paper towel (It is VERY important that you use Bounty. Cheaper brands break apart. I bought a roll of Bounty Basics from Dollar Tree.)

1 cup of purified water

1 Tbsp. coconut oil

1 Tbsp. baby wash (I made my own for this recipe. Let me know if you would like me to share it with you all)

2 drops Tea Tree essential oil (I do not recommend the brand pictured. Use Young Living brand)

2 drops Lavender essential oil (I recommend Young Living brand)


img_2896

Cut paper towel in half and place one half into the glass container. Using an electric knife worked the best for me.

DSCN1478

On medium heat in a small stove pot, mix water, coconut oil, and baby wash. Stir these ingredients together until all of the coconut oil has melted.

DSCN1481.JPG

Pour mixture over the paper towel. Add lavender to glass container.

DSCN1480

Add Tea Tree to the glass container.

DSCN1479

Close lid, and allow to sit for ten minutes. After the ten minuets is up, flip container over and allow the container to sit for an additional ten minutes.

DSCN1483

Open container and remove cardboard ring from container, and use away 😉

13 Uses of Breast Milk

Breast milk is probably one of the most amazing things..ever. It has amazing healing properties, and it’s the ideal nutrients for little one’s tummies. After making a list of the uses of coconut oil, I decided to come up with a list of the uses of breast milk!

#1. Drinking: Obviously science has proven that breast milk offers the perfect nutrition for little ones.

#2. Clogged Tear Ducts: Shortly after Jayce was born, a yucky puss started coming out of his eye. I put a little breast milk in it, and it worked great to clear it right up.

#3. Diaper Rash: Breast milk clears up red butts.

#4. Eczema: It clears up the yucky eczema I find on my arms.

#5. In baths: I like putting it in my son’s baths.

#6. Makeup Remover: Breast milk gets rid of makeup. It doesn’t sting eyes either!

#7. Donation: If you have extra breast milk, you can donate it for other babies in need.

#8. Ear Infection: Putting a few drops of milk in the ear can clear up the infection in 24-48 hours.

#9. Itch Reliever: Rubbing it on bug bites and other itches can relieve itches.

#10. Congested Baby: You can put a little bit of milk into an infant’s nose to help get rid of congestion.

#11. Birth Control: Lactating releases hormone that prevent ovulation from occurring.

#12. Lotion: Some people use breast milk as a lotion. You can always add in other ingredients too.

#13. Jewelry: Some people make breast milk jewelry.


50 of the Many Uses of Coconut Oil

Have I mentioned how much I LOVE coconut oil? No? Well I do! It smells AMAZING, and it works for literally everything. If you’re contemplating buying coconut oil, DO IT, like right now! DO IT! (Maybe I’m too hopped up on caffeine to be blogging)! Read this for a looong list of the uses of coconut oil! 🙂

#1. Toothpaste: It’s antibacterial and whitens teeth.

#2. Diaper Rash Cream: It cleans up those little red butts.

#3. In Place Of Butter: I constantly use coconut oil instead of butter. I fry everything it!

#4. Shaving Cream: I make my own shaving cream with a few ingredients, and coconut oil is one of them!

#5. Hair Masks: I mix coconut oil, olive oil, jojoba oil, and essential oils and leave it in my hair for a couple hours.

#6. Lotion: It clears up dry skin so well!

#7. Add Flavor to Beverages: People tell me that coconut oil is amazing as a coffee creamer. Although, I’m not a coffee drinker (I used to be, but pregnancy changed my taste buds), I LOVE putting coconut oil in my hot chocolate. It’s soo yummy.

#8. Face Moisturizer: I make my own face moisturizer with coconut oil.

#9. Chest Rub: I make a chest rub that’s safe and natural that I use on Jayce when he’s sick. It works great to get rid of colds.

#10. Nipple Cream: If you’re a breastfeeding mom, you know that it takes a toll on your nipples. I always put a little coconut oil on my nipples before pumping. It smells much better than Lanolin I think!

#11. Deodorant: I have yet to try this, but I know some people who uses coconut oil in their homemade deodorant.

#12. Clean Piercings: My ears are stretched, and coconut is the way I clean them!

#13. Chap Stick: Instead of spending money of chemical loaded chapstick, I just use a little from my big tub of coconut oil.

#14. Cradle Cap: If you have a little one, many people can attest that coconut oil clears it right up!

#15. Lactation Recipes: I think every recipe I’ve ever read to increase milk supply calls for coconut oil.

#16. Dog Treat: Use coconut oil as a treat for dogs!

#17. Oil Pulling: People swish a tablespoon of coconut oil around in their mouth for whiter and brighter teeth.

#18. Lubricant: It doesn’t upset vaginal flora, and works great as a natural lubricant.

#19. Get Rid of and Prevent Stretch Marks: I always rubbed (and still do) coconut oil anywhere where stretch marks can and do appear to prevent and treat them.

#20. Teething Cream: My little one is teething, and I use coconut oil as an anti-inflammatory on his gums.

#21. Baby Snack: My son loves eating coconut oil, so every now and then I dab a little on his tongue. He literally licks his lips. LOL!

#22. Stimulate Hair Growth: If you’ve ever heard of Inversion Method, it’s supposed to help hair grow rapidly. Using coconut oil is just that much more beneficial.

#23. Tanning Oil: Use coconut oil in place of tanning oil.

#24. Tummy Ache Rub: I make my own tummy rub with an essential oil, and I use coconut oil to dilute it.

#25. Dilute Essential Oils in Baths: I like to mix my essential oils with coconut oil before placing them in the bath, especially when it’s my son taking a bath.

#26. Natural Infection Cream: I make my own natural “Neosporin” with coconut oil.

#27. Eczema Cream: Just rub some on an eczema patch, and it helps eliminate it.

#28. Help Nails Grow: You can place it on your cuticles to help your nails grow.

#29. Avoid Chlorine Exposure: Place in on skin before swimming in a pool, and it protects the skin.

#30. Makeup Remover: It helps makeup, especially eye makeup, rub off easily without making skin/eyes sore.

#31. Massage Oil: It works great as a natural, yummy smelling massage oil.

#32. In Smoothies: I always mix coconut oil in my smoothies for a yummy taste with great health benefits.

#33. Homemade Mayonnaise: You can make your own mayonnaise, and use coconut oil in place of vegetable oils that are awful for you.

#34. Soothe Sore Throats: Coconut oil can coat your throat when it’s sore, and it tastes much better than store bought cough drops.

#35. Keep Eggs Fresh Longer: You can coat eggs in coconut oil, and it keeps them fresh longer!

#36. Wrinkle Reducer: People place in under their eyes to reduce wrinkles.

#37. Grow Eyelashes and Eyebrows: Placing it on your eyelashes and eyebrows can make them grow longer and thicker.

#38. Bath Bombs: You can make homemade bath bombs with coconut oil.

#38. Salt/Sugar Scrubs: Many recipes call for coconut oil in homemade salt and sugar scrubs.

#39. Colored Lip Gloss: Mixing coconut oil with cocoa powder and other ingredients can give you a cute tinted lip gloss.

#40. Cellulite Eliminator: You can mix coconut oil and essential oils and rub on skin to remove cellulite.

#41. Hair Detangler: You can use a small amount of coconut oil on tangled hair to get tough tangles out.

#42. Exfoliating Face Scrubs: You can mix coconut oil and other ingredients to get all of that dry skin off of your face.

#43. Clean Makeup Brushes: You can soak makeup brushes in coconut oil for a couple hours to eliminate bacteria on them.

#44. Replacement Hair Gel: You can use coconut oil in place of commercial hair gels.

#45. Homemade Candles: Many homemade candle recipes call for coconut oil.

#46. Grease for Zippers and Chains: Rubbing coconut oil on zippers and chains that are stuck can loosen them and help them function properly again.

#47. Furniture Polish: This helps coat furniture and protect it for dust. Make sure you try a little spot on furniture first, so you don’t ruin anything.

#48. Calms Frizzy Hair: Coconut oil helps tame crazy fizzy hair.

#49. Cleaning Baby Toys: I use coconut oil to clean my son’s pacifiers and teethers. The antibacterial properties kill germs.

#50. Soothes Itches: It can soothe itching from bug spites or other things that make you itch.

*Also, if you would like me to share any of the recipes I use that I’ve mentioned above just comment and let me know! I would LOVE to share them with you :)*

Blog at WordPress.com.

Up ↑